31 July, 2013

This car doesn't always like 'simple'

Why is it that summer always seems to fly by?  Here we are, cruising along and enjoying life, and July is over.  August, that month that inevitably offers a dichotomy of joy and sorrow, that month that sees the state fair while also begrudgingly ushering the return of school, is a month I love, but I also despise it.

Despite the time flying, I have not sat idly by and let the days go past.  Instead I've made wonderful progress on the Maxwell, far beyond what I thought I would accomplish in three short months (my God, it will have been three months since school ended...).  I won't go step-by-step, but I do want to chronicle my progress.

With the cowl and firewall gone, it's a much different car.
When we last spoke, I had just restored the radiator fan and reattached it to the cooling inlet pipe on the top of the engine.  If you saw the car now, though, you might notice a few more things have changed.  For one, I completely removed the firewall and the cowl over the engine.  I unbolted it from the frame and set it aside for later.  This gifted me better access to the reclusive corners of the engine, which has since allowed me to progress greatly on my cleaning.

Undoing five bolts on the right side frame rail, I delicately removed the steering column and steering mechanism, careful not to rip out the oil lines that snake from the oil pump to each of the cylinder bases.  What faced me was a dark, slightly rusted contraption that somehow translated a turn of the steering wheel into organized movements of the front tires.

This is the housing as seen from the front right.  Resting on its side,
the floor board can be seen with linkages still attached.
As with most parts of this car, after staring at it for quite some time, I formulated a process that I hoped would allow me to disassemble the entire thing.  The problem was, I wasn't sure how the steering wheel was held onto the steering column, and I didn't know how to disassemble little brass rods and lever arms that control throttle and spark advance.

A large nut was first removed from the swing arm that has a ball joint on the end of it.  This held a square peg that passed through the metal housing, held in place with a bolt that passed through a groove cut in the corner of the square.  In theory I should have been able to pull the whole thing free, but this car doesn't always like 'simple.'

What ensued was a titanic, two-hour-long battle that involved me hitting the thing with every hammer I could, heating it with a blowtorch, spraying it with every penetrating fluid I could find, then eventually deciding I didn't need to get the damn thing apart in the first place.  I figured I could smooth and prime it the way it was, so I found it prudent to reassemble it.  The only problem was, the threads on that main lever arm were warped from my incessant pounding.

It took me a little bit to stare and process what just happened, but an overwhelming disappointment dawned on me after realizing I had made such a rookie mistake.  I tried to re-thread the nut back onto the arm but was unsuccessful.  Of course we didn't have a die that was big enough to recut the threads, so I found several small screwdrivers and chiseled the bent ones back into place one thread at a time.

About half an hour into my repair I realized that if this didn't work, I would need to take the whole thing apart anyway to go get it fixed by someone with a big enough die.  Ironically, I had to press on after trying, failing, deciding to backtrack and failing again.  I employed a new method using a few increasingly larger chisels, also getting help from the blowtorch.  Amazingly, after quite some time I noticed the arm had moved ever so slightly, backing its way out of the housing.  I continued hammering at odd angles and prying, turning the arm every chance I got.  Somehow, in the end, I got it free of the housing and everything else came apart.
The arm is now free!  That was way more work than it should
have been, but now it works very well.

After an hour or so of sculpting the bent sections, the nut took to the threads almost as easily as before, and we were back in business.  Another bolt sat perpendicular to the steering column, and this helped hold the column casing into the aforementioned housing.  With this removed the column (and thus the gear on its end that turned the tires) slid free.

Eventually learning that the steering wheel was held on with a taper pin, I figured out which end to hit, but of course we didn't have an adequate size of drift punch to remove it.  Add in the fact that the opposite head had mushroomed over the edges of the hold, and I had to get the Dremel tool and a cutting wheel to smooth it and cut it back to size.

After using (and bending) a selection of bolts and drill bits and nails, the pin dropped out of the column and the steering wheel was free.  This allowed me to remove the inner rod and gear from the metal column casing, which I then took out and smoothed and primed.  In the meantime I took to the spark advance arms and rods.  Thankfully these were held in place by straight pins, but as before, I lacked a correct drift punch.  I looked in every drawer of our tool boxes, but I found nothing.  I decided to wait until my father came home from work to see if he knew where one could be found.

Oddly, he walked over to the drawer (which I had just emptied), opened it, and there lay a drift punch exactly the size I needed.  I have no idea...

With everything apart, I began to soak the brass parts in carb cleaner while taking everything else to the wire wheel.  After this, I smoothed and primed every piece, and I put the housing back together sans the steering column.  This will be much easier to maneuver into the frame rails; I can always put the steering column on later.

This was originally a 1910-1920s Ford wheel, but it's the right size!
On that same front, during some of my explorations recently I uncovered several wooden steering wheels.  As you may have noticed from the pictures here, the Maxwell has the arms to hold a wooden wheel, but there is none on the car.  This could have rotted away whilst the car sat pinned under the barn, or it could have been broken in the collapse.  Either way, all I have are the brass arms.  Interestingly, one of the wheels I uncovered should fit the Maxwell, so today I repaired a crack, sanded it down, and have the wheel ready to stain mahogany (which, from what I understand, is what Maxwell used as a color).

The problem is, the barn collapse bent the brass arms, so they don't line up with the holes on the wooden wheel.  With my father's engineer mind, he and I started a long process of hitting the arms and squeezing them between blocks on the vice, and slowly we're getting it back into shape.  At the end of the working day up in The Garage, he and I had the holes much closer to perfect than they were, but we still have a long way to go.  If I have to drill new holes, I will, too.

Here's the wheel after some initial sanding.
Also over the past few days I took the oil pump off the car---held in place by three bolts that hold a metal plate to the gearbox case.  With these removed, the oil pump slides forward and un-meshes with a gear that is attached to the exhaust gear.  From here, I removed the eight flathead screws on the front of the pump, which gave me access to its (wonderfully simple) interior.

I found out that there are two compartments with gears in the oil pump, each one of which has a solid gear that rotates with a hole in its metal.  This hole periodically lines up with holes that lead to the oil lines as the gear spins, thus distributing oil to wherever the car needs.  The middle wall of the oil pump sits between two gears that are attached to each other.  The posterior one turns from a gear that is attached to the gear that meshes with the one inside the gearbox (I know this is sounding rather abstract; I'll stop).  In all, it's a brilliant system, and the inside of the pump was incredibly shiny.

Piece by piece I disassembled the entire pump, periodically soaking parts in carb cleaner or running them under the wire brush.  Making sure not to damage the gaskets (which were very thin and plasticky), I discovered the last piece to remove was the gear that meshed with the exhaust gear.  This was held in place by a tight fit on a square peg that turned the first gear inside the pump.  Using a punch, this came out and revealed four flathead screw heads (which held the pump to the three-holed plate).  With these removed, the pump was now completely disassembled.

This is the pump when I took it off the car.
As of right now the pump is back together, spinning so much better than when I first tackled it.  It's back on the car, and it looks fantastic (even catching the eye of Steve Matchett the other day on Twitter!).
This is the oil pump completely disassembled and cleaned.
But this post is long enough.  In the next installment I'll go over my process for freeing up the engine, finding several new parts, thoughts on making a body and more.  Onward!
And the finished oil pump!

27 June, 2013

Progress that is wonderful to me, but inconsequential to an oblivious world

Some days in The Garage are definitely more fun than others, and while the past few days have been wonderful, there have been tinges of disappointment as well.  First, I'll start with the good.

As storms worked their way through the area and the humidity soared, I knew I couldn't do much with paint/primer and filler, so I thought I'd explore The Garage a little.  Moving the ladder around, I peeked above the plywood boards that make up the ceiling to see the loft---a mysterious frontier that has sat perfectly still for half a century.  The last person to move things around up there was my late grandfather, slowly accumulating items that he would buy from businesses that were closing their doors.

As a result, the bizarre mishmash of everything that occupies the loft in The Garage is wonderfully enigmatic.  Here's a fender, there's a grille, here's a box of bearings from the 1920s, there's a 1930s soapbox full of 1930s gauges.  On and on it goes, and it's all tossed so haphazardly in the dark, dusty space under the peak of the roof that I have to carry a light with me as I slide my way around on my stomach.

I spent several hours up there over two days, and I found a multitude of things that only I could appreciate (at least around here).  I plucked countless antiques from the dusty piles of randomness, cradling them in my arms like precious cargo each time I descended the ladder.  Meticulously I would brush them clean, admiring them both for the fact that they had sat untouched for decades and that they were last handled by my grandpa so many years ago.

In the end I was so thrilled with some of the treasures I uncovered, even if most people would dismiss them as a disjointed set of car parts and knickknacks.

By the time the weather improved I could finally work on the Maxwell and continue with my cleaning of the transmission.

In a way I had been blessed by the foibles of the old compressor, as all of the word I had received from the gentleman who had worked on these cars said not to sandblast the alloy case.  Thankfully my blasting had only knocked off the top layer of grease and not damaged the transmission, so I took down the tarps that hung from the car's sides and got a screwdriver and mineral spirits.  Scraping off the thickest dried grease, I then dabbed the metal with mineral spirits recycled from the transmission case.

The exhaust (L) and intake (R) gears, with the magneto's gear (C).
After letting it sit for a few moments, I used a wire brush to scrub, and that worked extremely well.  As of today, the entire crankcase is perfectly clean, and it looks incredible.  Yes, this was much more work than using the sandblaster, but my unspoken mantra of using as few power tools as possible during the restoration appreciated it.

With the case clear, I set out to remove the remainder of the linkages that would normally sit under the front floor (these included linkages for the brakes, clutch and gears).  It was here where the bane of my existence, those pesky rusted pins, began to mess with me again.

So painfully simple, these smooth pins are only held in with a cotter pin, yet over the last century they've become rusted and seized in their holes, refusing to budge even with the roughest persuasion I could apply.  Two of these pins in particular hung up my restoration for several hours in the past couple of days.

You can just barely see it here, but this is the cracked clamp.
Over the course of my efforts I used a screwdriver, a hammer, a bigger hammer, various chisels, vice grips, other bolts, two C-clamps (one of which I actually managed to crack in two) and a blowtorch.  Eventually I triumphed over both, but one of the arms coming off the clutch had bent slightly, so I used a massive four-foot-long prybar to bend it back today.

After all of this, I had every one of the linkages off and began work on cleaning and smoothing them.  I did the same for the gear selector plate (that pivots on the gearbox and moves the fork inside).  I scrubbed incessantly with the wire brush on the frame, occasionally uncovering some of the original blue paint that once adorned the entire underbody.

Over time I headed up to the engine to scrub there, and at the same time I started some disassembly (only of the most superficial parts).  I took the radiator fan off to clean and smooth it, and I must say, that turned out beautifully.  I only had to replace the ball bearings a few times after they all fell out, but by the end I had provisions in place to stop them from escaping again.

Excitingly, I'm nearly ready to reassemble all of those linkages, which means I can move entirely to the engine for the immediate future.  I realize some aspects of this may require quite a bit of work---possibly removing the entire engine from the car for a while, or at least taking off the heads to clean the cylinders---and in some cases this will take a couple of people to do, but I'm thrilled to get there.  I didn't know how long it would take me to sort everything out rearward, but I didn't figure I would get into the engine for quite some time.  I can only do so much, though.

The radiator fan before...
Scouring the exploded views from some 1910 books, I'm wondering where the oil tank on my car went (or even if it had one).  I'm wondering when the fuel lines disappeared (or the entire gas tank, for that matter), and I'm wondering how the shaft of the magneto interfaces with the sleeve on the top of the transmission case.  I don't know where the coil went (but I think it poked through the firewall), or if we can find a new one.  I don't have a wiring loom yet, nor do I have a couple of hoses.  I know the carburetor is not the correct one, which was common for cars back then, but I don't know how to make this one work with the car, either.  I could go on and on, but I won't.  The point is, while I can see the necessary steps to complete the restoration in my head, I'm not sure how I'll complete a couple of those steps along the way.

This is definitely disappointing, as every other time I think about the car, it feels like I'm getting more and more ahead of schedule in completing it.  What was once a distant, undated future completion date is drawing nearer and nearer with every 6+ hour shift I put in, but some thoughts make it drift helplessly farther into the future.

...and after!
Further adding to my uncertainty is the isolated state in which I work on this car.  Day after day I work alone in The Garage, accompanied occasionally by an Oldies radio station that fades in and out throughout the afternoon.  Some days I have the garage door open, sometimes I don't.  And it's here I toil for hours a day, making progress that is wonderful to me, but inconsequential to an oblivious world that only peers inside when I blog about my endeavors on here.  Even then I'm not so sure anyone reads what I write, but considering that I started this blog merely to be a record of my restoration projects, I guess I never intended it to be widely read.  But I digress.

This isolation makes it difficult to gauge my work.  I can't find other blogs out there that walk readers through a brass car restoration like mine, so I have no idea if my progress is average, slow or incomplete.  Many of the notes I send to owners and brass car specialists go unanswered, and the few that come back only address one of many questions I have over time.  It's frustrating, but not totally unexpected.

Some of that fortune changed the other day when I received two emails from two different gentlemen in Australia.  Neither have restored a Maxwell like mine, but both have worked on two-cylinder versions of my car, and both have gorgeous cars to which I hope mine can compare someday.  The first email, especially, caught me off-guard with one short line.

"Keep at it," he wrote, "you are doing well."

He didn't elaborate, nor did he sing my praises anymore than beyond that line, but I needed that.  I stopped reading for a moment and smiled.  Only a few people in my life have ever said that I'm doing a good job on the Maxwell, and while I'm not a narcissistic person who needs to hear encouragement, it felt very good to hear such words from someone who has been in my shoes.  To read that from someone who has resurrected a Maxwell of his own, it felt great.

So as I continue on my project, only I know the remaining steps of the restoration.  Each and every one is planned out in my head, and at any given time I have countless aspects of several steps swimming around my thoughts.  I know which parts should be easy and which ones will be challenging, and I know that there are many steps along the way that won't go as planned, too.  There will inevitably be moments when I'm thrown a wonderfully complex loop, and there will be moments when I do something foolish and set myself back a few steps, but that's part of the game.  That's what I find so enthralling with restoring this little car.

When people will ask me what I did this summer, I'll say, in part, that I worked in The Garage and made great progress on the Maxwell.  They'll smile and nod and find that interesting, but they'll have no idea of the moments when I sat inside the car's frame, my arms and neck intertwined with the rusted linkages as I scrub 100 years' worth of grime from the car's body.  They'll have no knowledge of the bloodied hands and the countless times when I've left The Garage covered from head to toe in dust, dirt and grime.  They won't know of my occasional frustration from fighting back the hands of time, and they won't know the sheer joy I share with the spirit of my grandfather whenever I make substantial progress.

But I will.  I remember all of it, and that's why I love doing this.  I'm not restoring a car for other people, nor am I struggling and hitting the car to impress others.  I'm doing this because I want to.  I'm being so meticulous for myself and for the spirit of the little car, whose sad life saw it spend most of its existence forgotten or neglected.  I want to make the car a show winner not for me, but because she deserves it.  And when she gets the honor and love she's been due for decades, I'll remember the blood and sweat, and I'll know every minute was worth it.

21 June, 2013

For the first time in over 50 years, the Maxwell had shifted gears

I was planning on writing a post about the verdict that came from the FIA's international tribunal today, but I spent so much time up in The Garage and made enough progress on the Maxwell that I thought I should document it.

I started the week sicker than a dog and spent the next few days bedridden.  When my strength finally returned, I received a wonderful jolt by the arrival of a well-taped box from a gentleman in California.  A native of my home state, he had moved to the the coast after World War II to work as a civil engineer, prepped by his years of working on tractors at a supply store.

When his brother propositioned him to take a rotting car off his property, he was well-prepared to tackle the project that faced him.  And so began Merle's passion for restoring two-cylinder Maxwells.  He has since resurrected a few of these wonderful little cars, so he had no need for a hefty Splitdorf Model F magneto, which was made for a 1910 four-cylinder Q3.

. . .

So when the box arrived, I unwrapped it with a restored vigor and plucked the gorgeous magneto from the cardboard.  In exquisite shape, the Model F honestly took my breath away.  There are only a handful of these contraptions left in the world, and few of them are as complete and spotless as this one.  The terminals on the front are a bit dusty, but the magnets and the brass on every inch of the thing are reflective, smooth and rust-free.

The Splitdorf company had already been in existence for decades when Jonathon Maxwell began using them to power his cars.  The Model F in particular was a strong mag.  Used (in adapted form) in the next few years on Indian and Harley Davidson motorcycles, the Splitdorfs for the Maxwells utilized a special base that hooked them to the top front crankcase cover.  A gear situated between the intake and exhaust gears allowed the engine's motions to turn the magneto's stator (for lack of a better term), and this, in concert with the coil, helped distribute the spark to the correct plugs.  I'll get to the wiring description later, though.

The gearbox, as I found it (mercifully in neutral).
With the mag now proudly displayed on the mantle back at home (until my mother gets fed up and puts it away), I instead focused on working my way through the Maxwell now that the rear end restoration is at an acceptable point.

With the brakes reassembled and the wheels remounted, I started cleaning the gearbox, which (as you know) was pretty gunky.  My grandfather, the first Woodsie, had the foresight to leave plenty of lubricant inside, and thankfully this staved off the rust over the last half century.

Using a screwdriver, I picked most of the gunk off and threw it in an oil pan, but after a while I knew I would need to go deeper.  Whether this meant total disassembly or a powerful liquid cleaner, I didn't know, but either way it would be a learning process.

I sought help with the Maxwell group online, which, by now, must think I'm a buffoonish amateur who is in way over his head.  The responses were very few, but all recommended against my father's insistence on using gasoline.  ("My dad cleaned parts with gasoline all the time," he said, "on everything.  It shouldn't hurt.")

So armed with a giant jug of mineral spirits, I poured some in.  Scrubbing with a little brush, I turned the thin, clear liquid into a dirty-oil-colored mush.  Naturally I added more.

As I scrubbed and removed more material, the shifting gears spun easier and easier, and more and more of the other gears slowly appeared from the murk.  Over time and after much staring, I ascertained how this wonderfully simple machine worked.

The center shaft you see is the transmission shaft.  It spins on its own, not powered directly by the engine, and turns the driveshaft/propshaft to the rear axle.  The gears that float on the transmission shaft slide forward and backward (in the picture above, which is positioned with the front of the car to the bottom of the picture) and engage the gears on the shaft to the left (right, in the picture), which is the countershaft.

The gears on the countershaft are fixed and are directly coupled at all times to the turning of the crankshaft (powered by that small gear you see on the transmission shaft at the bottom of the picture).  The single shifting fork pivots on a shaft that sits just laterally to the hole in the picture, and it slides the transmission gears back and forth on the shaft.  This is what engages slow, low, high and reverse (which is the little gear in the upper right corner that sits below the little gear on the countershaft).

I'm pretty sure this is how the Maxwell Q3 transmission works, but I'm not positive on ever aspect of it.  The countershaft can be adjusted with a bolt head on the outside of the gearbox casing that is on the anterior end of that countershaft, and on the posterior end it sits nestled inside a roller bearing.  The reverse gear can be removed with a large bolt head that sits just below the plate that covers the aforementioned roller bearing on the posterior end of the outside of the transmission case.

Cleaned somewhat, the gears now shift.
But okay, enough technical stuff.

Eventually I got curious with my cleaning efforts, so I took a wrench and gripped the post that pivots the shifting fork.  With a relatively easy pull, the transmission gears slid backward on the transmission shaft and settled nicely against the reverse gear on the back end of the gearbox.  For the first time in over 50 years, the Maxwell had shifted gears.

Now I can slide the gears all the way through their ranges of motion, accessing all the speeds the Maxwell can provide.  Moreover, this morning I removed the drain plug (which is at the front end of the transmission case) and drained the old mineral spirits before replacing it with new.  This, too, turned a dark brown after some scrubbing, but everything is much cleaner than it was before.

For the 'afternoon session' of Garage work I dug the old, once-used sandblaster out of a pile of junk by the '50s refrigerator with the intention of cleaning the bottom of the crankcase.  As you can tell by the photo, it's a bit greasy.  I took the coarse wire brush attachment on the ancient Montgomery Ward drill and tried to clean earlier, but it didn't do a great job punching through the caked-on grease.  The big gun would be brought in, but the sandblaster was a tad incomplete.

After finding a hose to come from the sandblaster, a hose to go to the gun, the gun itself and a connector to hook it to the compressor, I began patching up the holes in the hoses with duct tape.  Once this was complete, my dad found an old sandblasting hood for me while I hung tarps from the Maxwell to catch the flying silica sand.

With some adjustment of the pressures (starting at 60, moving up to 100), I eventually settled into a rhythm and got to work on the blasting.  Some parts of the case cleaned up well, but others proved trickier.  In the end, the old compressor was working pretty hard to keep up with the 80+ pounds of pressure I used with each blast, and with the duct tape patches in the hose leaking, I thought it best to power everything down and head home for the night.

There's much more I can say about the last couple of  days, but this post is long enough, and I still have silica sand lodged in my skin that I probably need to remove.  That's another good tip if you ever want to do some sandblasting---it definitely doesn't hurt to wear long sleeves.  Do it on a cool day, too.

03 June, 2013

I step over the footprints forever cast in concrete from The Garage's dedication half a century ago

One of my favorite moments of any summer is the first trip up to The Garage after a year away at school.

The old stone structure spent the past nine months enduring rain, bitter winds and driving snow.  My father once again became its primary caretaker, and as a result the interior gets a bit out of shape.  Tools are strewn about in different places from where I left them in August.  Several strange items find their way through the doors and end up tossed in a corner or in a potential work space (things like air conditioner covers, enormous blue tarps from purposes unknown and giant power tools purchased from Craigslist).

But when summer rolls around, I don my ratty garage clothes and practically sprint my way through the yard.  Swinging the off-kilter, green door open, I step over the footprints forever cast in concrete from The Garage's dedication half a century ago.  In a way, I'm home.

When I crossed the threshold for the first time this morning, though, I discovered the house was a mess.

I approached the day knowing full well that the first part of my work would involve cleaning and making the space usable, but the labor was necessary.  When I finished, I couldn't wait to dig in to all my projects that had been stewing in my mind for so many busy nights and days away at school.

I started the day tending to the Maxwell.  So much has happened in my planning process while I've been away.  A gentleman in California found me a genuine magneto (which is a huge step).  I now have the dimensions of the gas tank, for when I make it/have it made.  I have inquired about the springs and systems for the brakes, and I now know about the fuel lines.  I have a better handle on the color scheme for the car, and I have leads on material to use for the brake shoes (I'll be explaining all of this in the future as I reach these steps, so don't worry, I'm not leaving out details altogether).

In the short term, though, I needed to get the left side rear brakes apart.  I made good headway on this last summer, finding that the left side was coming apart a ton easier and quicker than the right side, but I still had issues separating the elements of the parking brakes.

Once I gathered most of my tools, the hand lights flickered on again and I settled in beside the old car, nestling myself against its cold, metal skin.  (I never did find Thor, though, which is a bit disconcerting, although it may have been off helping my mother lay some bricks several weeks ago.)

My first order of business was to clean the grime off the brakes so I could assess the state of the cotter pins I would be removing.  Armed with my safety goggles, I plugged in the ancient Montgomery Ward drill with the gnarly metal cleaning brush attachment and began scraping away the years.  By the time I finished, the sleek metal casing of the drill and most of my body were covered in brown and black dust that had been ripped from the car's metal.

In a pleasant surprise, I learned that the left side was, in fact, not more rusted than the right, it was merely covered in more gunk.  Suddenly I could see the subtle loop in the top of the crushed cotter pin on the parking brake.  I could see traces of blue paint left over from the Maxwell's glory days.  It was wonderful to see after such a short time working.

Using an old nail and a hammer with a wobbly head, I removed the cotter pin (the small hole in the right center of the picture) and squirted some WD-40 in the space it once occupied.  Using a series of chisels with increasingly wider tips, I began hammering between the brake support on the axle and the arm of the parking brake.  Slowly but surely this increased the space (after I filed a little off the end of the square post that makes up the actual braking mechanism), and in about ten minutes I had the pieces apart and ready to clean.

Pieces of the parking brake before...
For the first part of the cleaning process I put the newly-freed pieces to the wire brush, spinning the 40+ year-old motorized brush/grinder combo for maybe 20 minutes.  When I was done, the pieces were mostly rust-free but were pitted and rough.  I ground some surfaces of the parts before giving them all a bath in carb cleaner.  After letting them soak for a while, I started the smoothing process, which is still underway.

Pieces of the parking brake after cleaning (but before the smoothing)

In the meantime I put the right rear tire back on the car, although it seems to wobble a little more than when I took it off.  I suspect the locking pin may be a little off, or I may need to re-tighten the lug nut.  We'll see.  I'm not too worried about that for now; instead, I want to finish up the rear brakes and be done with them.  That way I can focus on the transmission and whatever else I want to get a start on this summer.

I have so many plans in my head, and I know what the next steps will be and in what order they need to be done---which is weird because I've never restored a brass car before.  I've just given it all so much thought that I know nearly every major piece of the car and what is required to make them functional and like new.  For now, though, I hope to finish the smoothing process on the left rear brakes and the axle tomorrow, but it's a time-consuming process, so we'll see.  In the meantime I've been cleaning and smoothing the fender supports on the front so that we can set the new fenders on the car to prevent their warping.

The supports weren't in bad shape, partially because my grandfather painted them long ago to protect them from rust.  In the days before he did this, though, they had gotten pitted and a little rough, but that's nothing I can't reverse.

I cleaned and started smoothing them this afternoon and evening, making great progress on the right side support in particular.  That's another piece I hope to have finished tomorrow, but the forecast of rain may delay the drying of the filler and primer.  It doesn't have to be perfect at this point; I just want to get the fenders sitting in a natural position.

I'll show some more pictures of the supports and things in the next post, but for now that's enough.  In all, it's been a wonderful day.

08 April, 2013

Forty-five years on, why Jim Clark's death still matters to Formula 1


Forty-five years ago yesterday, the world of Formula 1 changed forever.  Shockwaves rang all around the globe.  The racing community entered a state of shocked mourning.  Jim Clark was dead.

His fatal injuries delivered amidst the dense forests of the Hockenheimring, no one saw the crash that took his life.  Yet as his crumpled F2 Lotus lay smoldering in the trees, some of the greatest drivers of the day began to reassess their participation in the sport.

“If Jim Clark could die at the hands of a race car, what are our chances?” they began to ask.  Formula 1 was inherently dangerous, of course, but for it to have taken the life of the greatest driver of all time, especially in such a nondescript, mysterious way in a junior series, something was wrong.


In that day, it was not an easy task to upset F1 drivers.  They knew how deadly their sport was.  All of them grew up watching and participating in local competitions, the informality of which lent itself to terrifying and often fatal accidents.  They were not so far removed from the board track days of commentators yelling ‘
The fearless racers are coming into town tonight, risking life at every turn for your entertainment!’  They knew that from the beginning of the season until the end, at least one of their fellow drivers would not make it, and that was that.

But Clark’s death shook the drivers in such a way that had not been felt in ages.  Graham Hill, Jackie Stewart, Jack Brabham, John Surtees and Chris Amon---all friends and competitors of Clark---were deeply troubled by his loss.  Ask any driver today who raced with Clark in that time period, and they’ll tell you that crash resonates as strongly today as it did 45 years ago.

So why does this matter?  Nearly half a century has passed.  The old Hockenheim is gone, swallowed by the trees that took many lives over the years, and somewhere in the middle of it is a small, humble memorial set up for the two time World Champion Jim Clark.  So we lost an incredible driver.  That’s happened again since then, so why does this anniversary matter to Formula 1 today?


After Clark’s death, drivers like Jackie Stewart began to see the errors of their sport.  What is now runoff and gravel traps at modern circuits used to be fences and trees to the world of 1960s Grand Prix racing.  This was still four years removed from F1 making seat belts mandatory.  Drivers died just as often of fire from the metal fuel tanks on which they sat as they did from the actual crashes.

“We thought hay bales were enough to protect the crowds,” legendary motor sport journalist Chris Economaki told me years ago.  It was a nonchalant feeling that if you wanted to go watch a race, you were willing to sit in the path of a 180mph metal rocket full of a flammable cocktail of fluids.  After Jim Clark, and reinforced by the horror at Monza in 1961 (a crash of which Clark had been a part), this began to change.

Stewart’s now-famous march toward greater F1 safety started after a harrowing and terrifying crash at Spa-Francorchamps, but his resolve was further strengthened 45 years ago yesterday when his friend and on-track rival Clark was killed.  The feelings and ensuing changes were not unlike what modern racing went through when Ayrton Senna lost his life at Imola 19 years ago:  A World Drivers Champion killed in his car after setting the racing world on fire and breaking F1’s longstanding records.  People were shocked.  People demanded change, and they got it.  From Senna’s death, Formula 1 is a safer place, forced to reassess its mentality and thoroughness in driver care.


But F1 would not have been in such a position and arguably may not have had as much success were it not already shocked several times in the past by such losses.  Not to overlook or downplay the role that losing Gilles Villeneuve, Jochen Rindt, Ronnie Peterson or countless others had in the previous 30 years before Imola, but losing the Flying Scotsman was different at that time.

He was not just a World Champion, he was everywhere.  In 1965 alone he competed in 59 different events, ranging from the Tasman Series, to the Indianapolis 500, to Formula 1, to F2 and sports cars.  He won the Indy 500 once (and came close several other times were it not for mechanical issues).  He dabbled in NASCAR (something few remember, but he had relative success were it not for mechanical problems there, too).  He won more Tasman championships in Australia and New Zealand than F1 championships, all the while winning more Grands Prix and capturing more pole positions than any Grand Prix driver in history.  And he only finished second in one race in his entire 71-race F1 career.

His attention to even the minutest details made him a perfectionist both in and out of the car---and in racing that’s not always a bad thing.  But people criticized him, saying he could only win from pole position and that he couldn’t fight his way through the field.  His choice to race the Indy 500 instead of the Monaco Grand Prix drew ire from some.  But Clark was not interested in this.

He would fire back at the critics through carefully written newspaper columns, but he would leave it at that.  His gentle schoolboy-like demeanor would disappear when he stepped into a racecar and tightened his dark blue Bell Magnum helmet onto his head.  And that’s how many remember him.  The rather demure personality and finger biting Jim Clark disappeared in the race car, where he instead entered a state of zen, never driving out of anger or aggression.  He was on another level, both with his competition and his car handling.


But when Clark’s funeral was attended by racing legends from all over the globe, the sport collectively took a step back and wondered what could be done.  The result was a slow and steady march toward the safety of Grand Prix racing as we know it today.  It also forced the fans to grapple with the mortality of even the best drivers out there---something that the crowd, even today, tend to forget or set aside. 

One thing they don’t forget is the brilliance of a youngster named Jim Clark.  Ask any racing driver out there, and they will hold Clark in high regard.  Ask IndyCar champion Dario Franchitti, who has an enormous collection of Clark memorabilia filling rooms of his house, and he’s incredibly quick to tell you that his countryman was the greatest racing driver who ever lived.  Will we see another Jim Clark in our era?  Perhaps not.  There has never been anyone quite like him, and although he was only in the international racing spotlight for under a decade, tales of his skill and accomplishments are known worldwide and are still discussed in Formula 1 circles today.  His loss changed Grand Prix racing, but so did his driving and charisma while he was alive.  That’s why the anniversary matters.  That’s why he matters.


02 March, 2013

Romain's Renaissance


In his first lap of testing earlier this week Romain Grosjean’s car went spinning into the gravel in Barcelona, and the cynics of the F1 world let out a chuckle.  Could they expect anything less from the man branded the “First-lap nutcase” by Mark Webber last season?  But maybe that mentality will change in the media this season partially because of Grosjean’s admittance of using a psychologist last season.

Speaking to reporters at the test, the Frenchman revealed that he started seeing a sports psychologist last September in the midst of an F1 season marred by a string of incidents that eventually led to a one-race ban.

It's not a secret that I started work with a psychologist in September last year and it went very well during the winter,” Grosjean said.  “I had a lot of discussion with Genii [the financial and investment firm that sponsors the Lotus Team] to try to help them understand and take the right decision. And when they called me to say, 'Okay we go again for one more year' I was more than happy.”

Grosjean’s openness about seeking help is a welcome change to professional sports in general, although the impact of his reveal may not change the face of racing.  Instead it’s a reminder of the human side of the sport that so many gloss over.

In F1 especially there is a mentality of placing blame quickly and accurately.  If an incident occurs, people want to know who the stewards will punish and how.  If cars careen off the track, whose fault is it?  Have they done it before?  If so, then punish them more!

That’s not to say this mentality is flawed, though.  In a sport where lives are frequently put in danger through dangerous or careless moves, drivers must be made to stay in line and race in a safe way.  But in Grosjean’s case, stewards’ decisions were not the tipping point, whether he admits this or not.

*  *  *

It was relatively cool for Bahrain standards, but the steamy race at the Sakhir circuit in late April of last year looked to be a defining one for Romain Grosjean.  Starting P7, the Frenchman made a brilliant start and began a slow and steady march through the field.

By the fourth lap he had disposed of Mark Webber in the champion Red Bull RB8.  Three laps later he was by Lewis Hamilton.  He needed to keep this up.

Using tyre strategy to his advantage, Grosjean ran P2 in the late stages of the race before his teammate, on better tyres, got by him.  Still, he stayed with the frontrunners in the closing laps and secured the first podium of his short career.

He was ecstatic, becoming the first Frenchman to stand on an F1 podium in 14 years, and he beamed with the promise of a long season ahead after such incredible early returns.  He followed that up with a fourth place finish, then a P2, sprinkling a “Fastest Lap” honor in there as well.  Another second place finish and podium ensued.  Good things were in store for Romain Grosjean.

*  *  *

“We had good results (last season),” Grosjean said at the Lotus car launch a while back.  “Quicker than I was expecting, but maybe I wanted a little too much.”

If there’s anything of which F1 drivers could be accused, it’s certainly not lack of want.  Any driver lacking passion to win would not have made it to Formula 1, and Grosjean is no exception (especially since this is his second go-around in the sport after a disastrous campaign alongside Fernando Alonso at Renault).  So yes, maybe Grosjean was a little overambitious in some of his moves and decisions, but I think his issue is a deeper one.

The picture that the media painted of Grosjean was not a pretty one.  Far from being hateful, everyone began to associate him with crashes.  Internet memes celebrated his failures.  Drivers laughed when being asked about starting a race near him.  If he and Maldonado were in the same sector, look out!

Whether Romain has acknowledged these characterizations of him, I have no idea.  One can be sure that it weighed on him every time he found himself in a tricky situation.  Every decision must now be reconsidered.  ‘If I mess this up, will I be giving everyone more fodder?  I have to stay clean.’

*  *  *

On the second day of September, the 2012 Belgian Grand Prix began at the might Spa-Francorchamps.  Romain Grosjean started P9 on the run to La Source hairpin, but few remember his starting position.  Even fewer remember the clutch slip by Pastor Maldonado that caused the field to splay, or the launch that Grosjean got to position himself on the inside line at the first corner.

In the blink of an eye, it happened.  Hairpins like La Source lend themselves to crashes on race starts, but this one was different.  Grosjean found Hamilton to his inside, and in a split second the two had touched wheels.  Everyone remembers the crash that ensued, seeing Grosjean punt Perez before becoming airborne.  Everyone remembers the scary onboard image from the cockpit of Alonso’s Ferrari, and everyone remembers the runoff littered with carbon fiber and steaming cars.

Grosjean would earn a one race ban for his involvement in the incident, and a short time later he sought the help of a sports psychologist.  His approach to racing and his handling of the pressure that came with his incidents needed rethinking.  Romain Grosjean knew that his career could be significantly shortened, but not because of his driving, but because of the space between his ears.

*  *  *

Regardless of how accurate the depictions of Grosjean’s accident-causing nature have been, his courage to seek help both in the interest of his career and for the safety of those around him is unprecedented in modern Grand Prix racing.  It is a situation in stark contrast with the cutthroat nature of F1 where a driver’s underachieving inevitably means his career will be over as soon as his contract allows.

For Romain to take a step back and try to better his career underlies the notion that drivers are human and are incredibly susceptible to issues of self-confidence and doubt.

As media and fans, we are quick to praise the drivers that find themselves in such beautiful flow in a racecar---a phenomenon that is centered in the mind.  But we are equally as quick to pin everything on the driver when he has a string of bad finishes, accidents or incidents.  We remove the mental aspect of the sport in these situations and just assume that there was a dumb decision, a momentary lapse of judgment.  Put two or three of those incidents near each other on the calendar and people label the driver as a “problem.”

This is the spiral that Grosjean entered.  The ban forced him to rethink his role in the team and his approach to the races.  Even so there were still incidents in the next Grands Prix:  He ran into Webber in the very next race at Suzuka, he was part of a first lap incident in Abu Dhabi, and he hit the HRT of Pedro de la Rosa in Brazil.  The end-of-season break was extremely welcomed by Romain if not only for the fact of getting the bad taste out of his mouth.  He would have work to do in the offseason, though.

*  *  *

Tom Kristensen is a racing legend.  His eight victories in Le Mans and his stellar track record in endurance racing and DTM will attest to this.  How could a maligned, laughing stock of a racer compare to this, much less beat him head-to-head on an international stage?

This was the situation facing Romain Grosjean in Bangkok, Thailand last December.  After a dream finish of second in the Nations Cup of the Race of Champions, Grosjean had improbably worked his way through the Champion of Champions bracket and found himself in the final against Kristensen---a man who has been there before.

The story would be too fantastic to write if the Frenchman won, but what a better way to usher in the new season than by beating one of the best?

Two races and two victories later, though, and Romain Grosjean was the 2012 Champion of Champions.  He had won the honor that has evaded Kristensen to this day, and the media began to see a changed driver.  He was smiling more; he was excited for the future again.  He was thrilled to hoist the trophy that few believed he would ever win.

One day later he received news that he would be driving for the Lotus F1 Team in 2013.

*  *  *

“He’s a different guy now,” Lotus chairman Gerard Lopez said.  “He knows what he has to do.  He doesn’t have that pressure, stress. … We essentially have told him he's got a long-term future with us so now he can literally take it race by race, practice by practice."

And it’s that freedom from pressure that should propel Grosjean to bigger and better things.  Having been a champion in every series in which he’s run, the Frenchman is well aware of what it will take to find success in Formula 1.  He also knows that the key to that success lies not in the engineering of a carbon fiber and titanium, four-wheeled rocket.  It lies within his mind.

On Friday Grosjean ran a successful program for Lotus in testing at Barcelona, and at the end of the day he sat at the top of the timesheets.  Granted, times don’t mean much in testing, but tell that to Romain Grosjean’s confidence.

08 January, 2013

Dragging my poor little Raleigh behind me

Well, where to begin?

If you've been following my Twitter account at all you will know I've been quite busy these past few months.  First and foremost I am happy to report that I passed my first semester of medical school.  It was close on one class, but I passed them all and made it to break.  Those last couple of weeks were absolutely terrifying at times, mixed with a few sleepless nights and some overwhelming feelings of defeat.  There were some nights when I would feel rather crushed under the weight of everything, sure that I would fail my upcoming test (and thus the class), sure that I had run out of time to study adequately, sure that I was trying so hard that I couldn't do any better.

This is what I would see for hours at a time whilst studying biochem.
On some of those occasions I was right.  I ended up doing badly on some tests.  Many of those times occurred on the weeks when I dissected, meaning I lost seven hours of studying to the anatomy lab (far more if the lab practical was approaching).  One particularly bad week led up to a biochem test---arguably my weakest class of the semester, never having taken biochem before.  The test would not only be one of the most difficult of the year, but I was planning the epic journey to the U.S. Grand Prix, I dissected that week, and the Monday beforehand I got hit by a car.

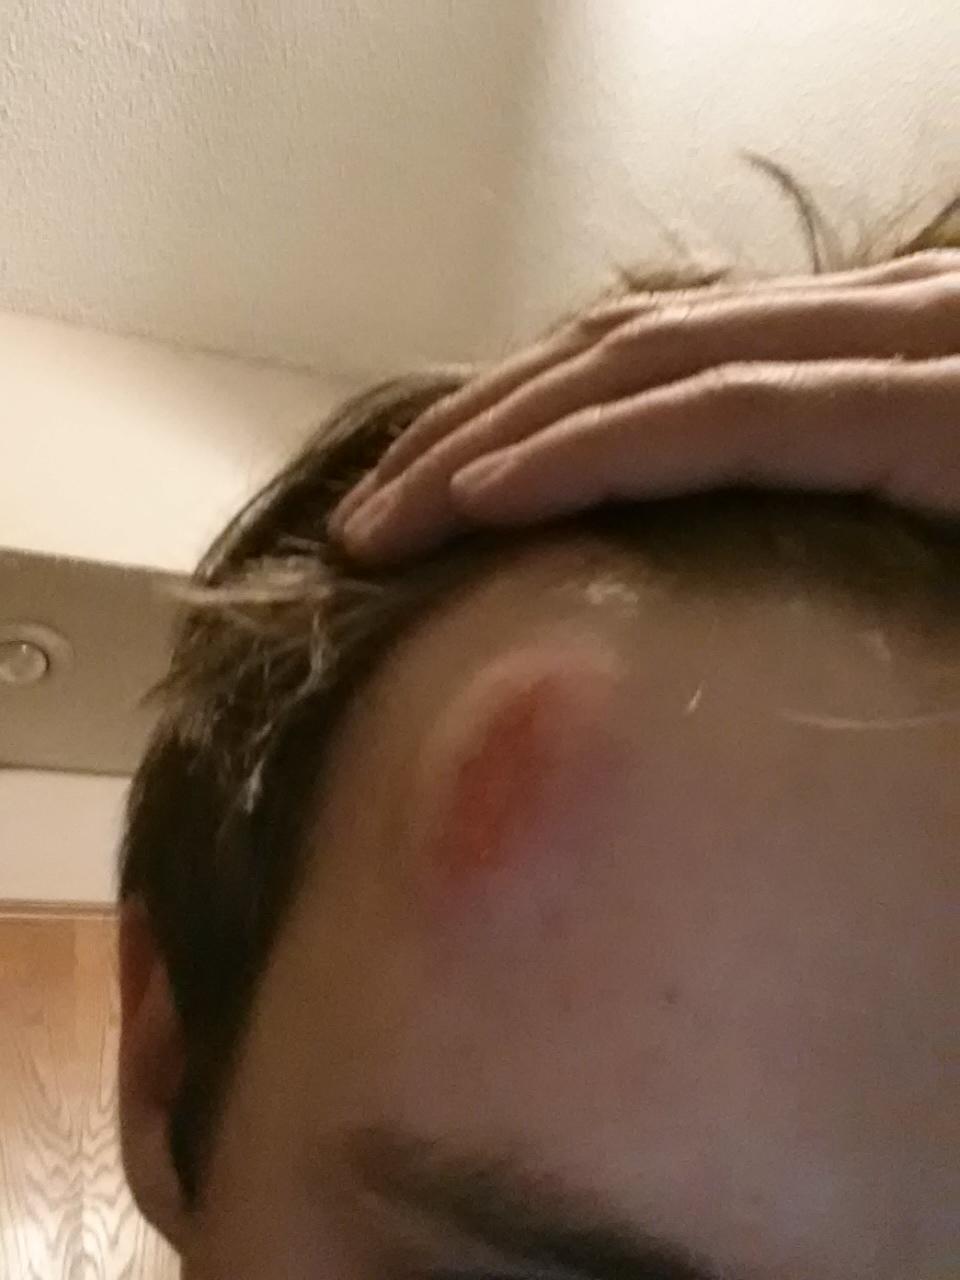
I detailed my accident thoroughly on Twitter, but in a nutshell, I was riding my old Raleigh bicycle when a white 2009 BMW M3 pulled in front of me.  We met at his quarter panel, I was sent up onto the hood, and my tailbone broke the fellow's windshield.  I hit the ground and had some scrapes and a nasty bump on my head, but for the most part I was okay.  As the adrenaline set in I was even more okay, and because the attending policeman never offered me a ride back to my apartment, I had to hobble home dragging my poor little Raleigh behind me.

Ow.
The next few days were extremely difficult, as every time I moved my body would ache and take my breath away.  It's amazing how much we use some of those little muscles in our lower backs, yet we never know until they're injured.  That was certainly the case with me despite my constant doses of Ibuprofen and intervals of ice packs.  Nonetheless, I healed up enough to walk with only a slight limp by the end of the week.  I still approached the thought of riding 14 hours in a car cautiously, as my tailbone had not been tested for such a long duration.  My fears proved unfounded, though, and my tailbone rarely disagreed with the long journey.

The journey to Austin and back is a wonderful story, but that will have to occupy another blog post.  For now I'll say that it went far better than I imagined, and we all got to see and do so many great things.  It was fantastic to witness Formula 1 in the flesh (er...carbon fiber) again, and the race also exceeded my expectations.  The circuit fits F1 very well, and all indications say that the city can hold its own, too.

After the Thanksgiving break it was back to school for the last push toward finals.  Needless to say that occupied most of my time.  Once on break I quickly adapted to doing nothing.  Such a transformation did not occur overnight, though.  After going 100 miles per hour for so long, it takes more than a day to settle down and come to a stop.  Predictably there were countless moments where I would consider what needed studying before embarking on whatever endeavor I chose.  I would feel terribly guilty for relaxing and doing nothing, and it took a while before I stopped.

In true "me" fashion this break has been quite busy.  I've been working on several projects, and I'll greatly miss them once I go back to school in a week.  One of these will necessitate its own post, and that's my go kart.  Again, if you've been following my Twitter (@WoodsiesGarage) you will have heard a great deal about this, but I got an incredible deal on a mini-Indy-style go kart that had been in a flood, and I've been cleaning it and piecing it back together.  I'll try to resume this project once I get back to school (since that's the town where the kart resides at the moment), and hopefully it will be running by the time it gets warm outside.

Another fun project has been the acquiring of my water pump for construction of a suction dredge/highbanker for gold prospecting.  With any luck I should be receiving the body for my sluice box tomorrow, so I'll try to post pictures.  I'm not too rushed in construction since I can't use it until spring anyway, but we'll see how it goes.

She's somewhere under that drift.
On another car front, I swapped the regular tires for snow tires on the TT a while back.  This was just in time for the car to be engulfed in an almighty blizzard, leaving it entombed in ten inches of snow for a week.  I finally dug her out, and now she's happily enjoying the warmer weather and diminishing snow.  With temperatures forecast to be in the 40s this week we should see most of the accumulation disappear, but I'll be leaving those snow tires on for a while, I'm afraid.

For now I think that's plenty of catch-up.  I have much to share in the ensuing posts (which I hope to create before I head back to school), so hopefully you'll enjoy reading it.  I'm sorry I haven't written more, but I'm trying to use my time to the fullest, including the break.  There is plenty more to come, though!

12 October, 2012

A relentless machine of studying, class and occasionally sleep

I'll start right now by apologizing for being aloof, but you must believe me, I would love nothing more in this world than to have the time to devote to updating you adequately.

In the weeks following my last blog post, I spent them up in The Garage working on the Maxwell, going on the Small Town Adventure and trying to do as many things as I could before summer ended.  My dream of finding an F1-related summer job didn't pan out, but I got to be the trackside reporter for every race at the Iowa Speedway, so that was fantastic.  Nothing like a Spa-Francorchamps or Suzuka, but it was fun nonetheless.  Plus when Indy came to town I got to be in my element.

As the only weekend of open-wheel racing passed at the Speedway, I got to interview Helio Castroneves and the eventual race winner Ryan Hunter-Reay.  I didn't know it at the time, but he would later go on to be this year's IndyCar champion---the first American in half a dozen years.

Then everything changed.  Orientation days.  Textbooks.  White coat fittings.  The works.  Med school began in a flurry for me, and while it started well, it has since become a relentless machine of studying, class and occasionally sleep.  The subjects are interesting, don't get me wrong, and the information is imperative to my success as a doctor someday, but one loses sight of such things with every passing day of six-hour study sessions.

Couple that with the fact that the work load is much greater than anything I've ever experienced in school, and it shouldn't be surprising that it's taking a while to get my sea legs.  If I were a sailor, though, I would have been kicked out of the Navy at this point for not developing those legs fast enough.  I won't lie, it's very difficult.  That's not to say that I can't do it, but often times I forget to tell myself that amidst the dissections, small groups, random assignments and weekly tests.

Along that same note, I talked to my great uncle Irvin on the phone today for about an hour.  His son is a doctor at the VA where Irvin, himself worked for many years.  His late daughter was a nurse there, and his other son is a doctor in my hometown.  I knew he might have some words of wisdom for me, and he didn't disappoint.  He told me stories of some of his doctor friends in the 1930s and of his son's difficult adjustment to med school in the '80s.  He spoke of the omnipresent geniuses that inevitably crawl out of the woodwork around the toughest test dates.  On and on we talked, and he helped remind me that there are worse things in life.

Just a year ago I was nervous about getting admitted to med school instead of completing it.  I was facing the prospect of a year of waiting to reapply, a year of boosting my resume and a year of paying for more school.  Instead of being faced with exams and projects, I may not have gotten in for another year.  I may not have gotten admitted at all.  This is what I wanted, as hard as it is to reconcile that these days.  I mention anything about that to my parents and it's always the same:  "It'll be worth it in the long-run."  That may be true, but it doesn't really help alleviate the stress or make a difficult concept any more tenable.  I appreciate their support, though, don't get me wrong.

But I digress.  As a result of school I haven't been able to work on any of my projects.  Heck, I don't think I've mentioned prior to this that I got a go-kart.  It needs a little engine work from a flood, but that's more than doable.  Plus it's a mini-Indy style kart that I'm planning to paint like Senna's old Lotus.  It will be so neat to get running, if that day ever comes.  God, I hope it does.

I haven't done a ton more to the Honda.  A leaky carb one weekend prompted the owners of my condo building to call me and ask if I knew anything about a leaky, smelly motorcycle in the garage.  I knew nothing of a leak prior to leaving, and I was just then hearing about it whilst driving down a country road literally two hundred miles away.  Awesome.  So I loaded the old girl into a truck and brought her back to my hometown where the local motorcycle mechanic took a look at the carb (those Japanese carburetors are beyond me).  He fiddled with it, replaced a seal, patted her on the rear and sent her back to me.  A fortnight later she was leaking again, so I'm leaning toward putting an external petcock halfway down the fuel line (as unauthentic as that will look).  I feel guilty, though; I haven't even started her in a month.  I haven't had the time to risk her leaking and losing another two gallons of petrol, so I just haven't tried.  Instead I've been riding the 'new' 1983 Raleigh cycle I received.

Since that was earlier in the semester, I had time to get the old Raleigh working.  She had a severely bent rear rim, so I had to replace that, put on a new tube and tire and figure out where an incessant squeaking was originating.  Some 30wt oil on the chain and into the pedals helped a ton, and now she runs silently and shifts smoothly.  I've been meaning to put my lock holder on for weeks, and the same goes for the rear light. I just put the front light on two days ago when I knew I would be riding home from a study session in the dark.  But in all, working on her has been fun.  I'm not terribly experienced in bicycles, but my motorcycle knowledge helps with that quite a bit.  I will admit, though, an occasional Google search may have helped, too.

I don't want to make this too terribly long, so I'll cut this short here.  I have plenty of other things to update, but I felt that after a long, difficult week (both in terms of studying and mentally) I needed to type something and get my mind off of school.  Writing and F1 have been the only things today that have been able to accomplish that feat, so why not?

Take care, all.  More to come, hopefully.

25 June, 2012

The time I spent just hitting this car with Thor cannot be overstated

Well today was certainly busy, but I wouldn't have it any other way.

I spent six hours in The Garage today working on the Maxwell brakes (and other projects on the side), and I couldn't be happier at the results.  So much has happened up there since my last post about the little Maxwell that I don't know where to start.

Last post I had just gone through the incredibly difficult process of getting the axle re-aligned and hooked back to the leaf springs.  I was aided by new U-bolts that were fabricated for free by some colleagues, and they ended up looking fantastic.  After the axle was hooked back on, now it was time to move onto the brakes, starting with the right rear (or the right, since there are no brakes on the front axle).

The first order of business was to remove the adjusting nut at the top front of the brakes.  The Maxwell had an ingenious system that takes all of two minutes to understand:  Rods connect the front brake lever to each of the rear brakes.  Where the rod comes in, there is a pivot point.  When you brake the car, it pulls the top of the brakes forward, squeezing the pads against the drum of the wheel (which, unlike modern drum brakes is inside of the pads).  Springs along a horizontal rod get compressed as that top moves forward, so when you're ready to let off, the brakes spring back to normal.  That's all there is to it, really.
The above is a picture from the rear center of the car looking outward.  You can see the pivot point in the center of the picture and the springs at the top.  The two pads are of some undetermined construction, so I'll have to do some checking to figure out what to use as pads.  Either way they're held on with brass rivets, so that shouldn't be a problem.

As you can also see above, I'd been dousing the moving parts of the brakes with penetrating oil every chance I got.  When I first began tinkering with the car long ago, nothing moved on the brakes.  By the time that picture was taken, I could pivot the arm and thus apply the brakes slightly, but there still was not much movement.

The first order of business would be to get the tire off---something I've never done on this car before.  I had attempted it long ago but soon gave up to go work on other things, as the wheel puller we have was not quite the right size to aid in the removal of this particular wood spoke wheel.

When taking the wheels off the Maxwell, first one has to remove the main lug nut and then a washer that comes off of the spindle.  From here, theoretically, with some force the wheel can be removed.  Not so easy in this case.

I bashed on the tire relentlessly for quite some time before attempting other methods (prying, wiggling, lubricating, etc.) until my father arrived home from work.  He bashed it a few times before recommending that we try hitting it a slightly different way.  The last time he had removed a wheel this old was when he was a young child and his father (the first Woodsie) restored a ~1903 Franklin.  Eventually we were successful, although the locking pin inside the wheel gave much sooner than I anticipated, thus injuring my leg as it leapt joyfully from the car.  This came after my father set a giant, super heavy mallet on the tire, only to have the tire rotate and send the enormous mallet crashing into my knee.

With the tire off I had an unabated view of the brakes like I'd never had before.  The scene did not look promising, though.  So much rust and so few moving parts meant that I would risk breaking a few old pieces if I struggled too much with them during removal.  With that in mind I gathered WD40 and a newly-discovered old can of PB Blaster, alternating use between the two on whatever part I needed freed.

I also tried my hand at mixing my own penetrating oil based on some wives tales I'd heard on the internet.  After gaining access to a new bottle of acetone, I found a 1980s bottle of automatic transmission fluid (ATF) and a 1960s Vlasic pickle jar in which to mix the two together.  Pouring my home brew over the parts, I soon found that the combinations of my three oils were actually loosening some of the rusted pieces.
I removed the brake adjuster (as seen above) and found that there were little swatches of the original blue paint still on it from 1910.  At the same time I also learned that this always-black piece (which I assumed in the past to be Bakelite) was actually brass!  I can't imagine how gorgeous it must look clean, but the aforementioned swatches tell me that it was once painted, so I may have to cover it in the end.
I used my grandfather's tap and die set to clean the threads on the adjusting nut and on the brakes as well (I love that set, by the way.  It always makes me so proud and honored to use it).  Then I scrubbed a little on the brakes themselves (seen below).  I soon realized that in order to make them work again I would need to take them entirely apart; as a result, my task just seemed a whole lot bigger.  I would begin by using the super large rubber mallet---which I now affectionately call Thor---to hit the brakes in every direction I could just to free them up.
After a while I could get the shoes to move inward and outward slightly, but not much.  Without the impediment of the wheel I could, for once, take a full swing when hitting the car.  I'm sure Thor loved this as much as I did.  Eventually I also spent some time hitting the pivot point (parallel onto the leftmost part of the spring in the above picture).  After a while this too could actually pivot and move for the first time in my life.  I soon realized that the little pin that held the threaded piece onto the arm would be a beast to remove, as would the one below it where the arm attaches to the rear brake pad.  Both would have to come out, though, if I hoped to get the thing working again.

The time I spent just hitting this car with Thor cannot be overstated.  I would work up sweat after sweat, spending five or ten minutes at a time repeatedly hitting different parts of this car and seeing them move millimeters at a time.  I would sometimes switch to the regular metal hammer before going back to Thor, but in the end I had always made a little progress.  If I combined my hitting episodes, though, I imagine I spent a few hours of my life hitting that car.  In the end, though, the arm would pivot easily and the springs would actually spring the arm back into place!  In essence, the brakes were extremely close to working!

I knew this was not good enough, though, and that the car needed to be done correctly, so I persisted.  I whacked the brake pads far enough apart that I could get the forward spring off the adjusting threads, then eventually I wiggled the pads enough to get the whole adjustment thread piece out of the center guide on the axle.  This meant I was free at the top of the brakes and had just one nut at the bottom to remove before the whole brake mechanism could come off the car.

In the meantime I tried hundreds of different ways to get those pins out.  I pried, I hit them, I grabbed them with vise-grips, I jammed different sized screwdrivers under their heads, I used a propane torch to heat the metal before hitting them and prying them and grabbing them some more.  On and on I went to no avail.  This was turning into the hardest part of the restoration so far.
The elements of my home brew of penetrating oil.
Part of the ongoing trouble was the fact that early on I planned on making my own pin-remover with a socket and a clamp, but the only clamp that we had was (1) old, as expected, (2) didn't have a rotating head on the threaded end, and (3) was not in the least bit square and straight.  As a result, when I tried to screw the clamp inward, it pushed itself off of the pin or off of the socket.  When I tried it the other way the old metal on the clamp would give way and the socket would gouge into it.

After some time I decided to move onto that bottom nut that would free the brake mechanism.  Oddly, this was incredibly easy to remove, which was a byproduct of soaking the whole thing in penetrating oil repeatedly.  And with that, I became the first person in 100 years to be holding the Maxwell's brakes in my hands, which was a pretty amazing feeling.

But this blog post is far too long as is.  There's so much more to talk about, but that will have to be in the next post.  In the meantime feel free to get (mostly) realtime briefs on Twitter at @WoodsiesGarage.  Thanks, all!